Why Bike Maintenance is a Must for Adventure Cyclists
As the adventure quotient of your rides increases, so do the consequences of mechanical failures. When you’re down the block or even across town, a worn brake pad or snapped shifter cable isn’t catastrophic. These equipment failures might end your ride, but you at least have lots of options for getting yourself home.
But what if you’re on an adventure in the backcountry, 10 miles from the nearest road and without a cell signal? You might have no choice but to hike yourself out. That’s why the higher stakes of adventure rides make it all the more important to carry out basic bike maintenance. But even before getting to the point of adjusting or replacing parts, bike maintenance begins with inspecting your equipment.
Before you head out on an adventure, these are the parts of your bike I recommend inspecting (and what to look for):
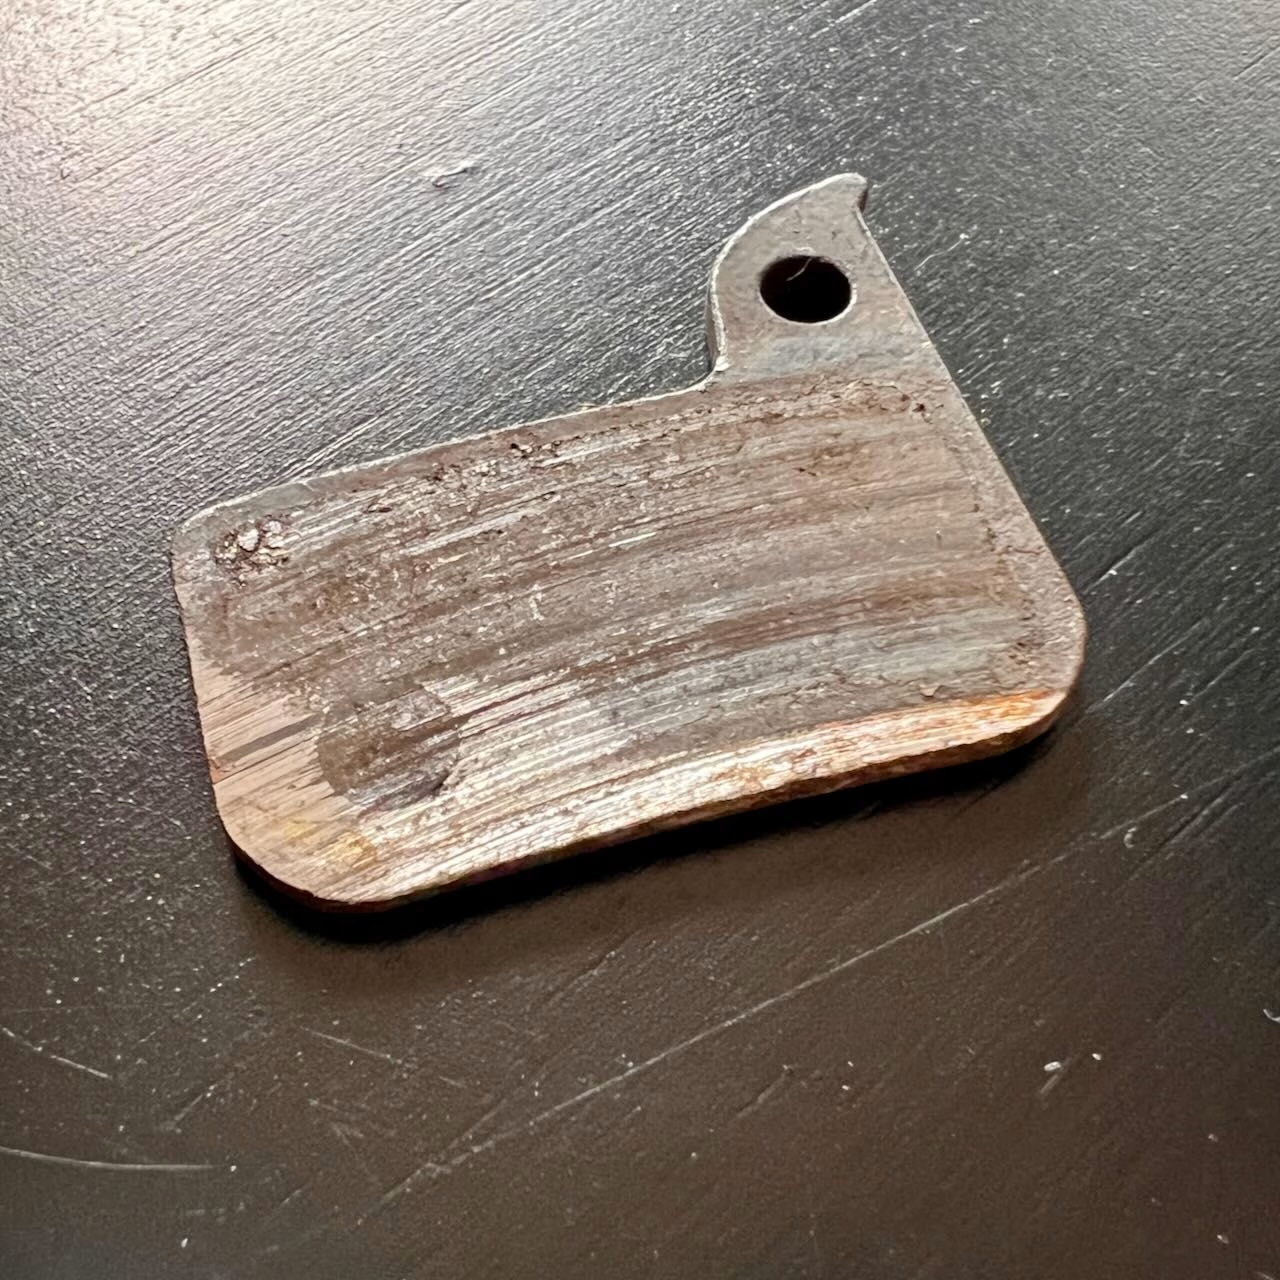
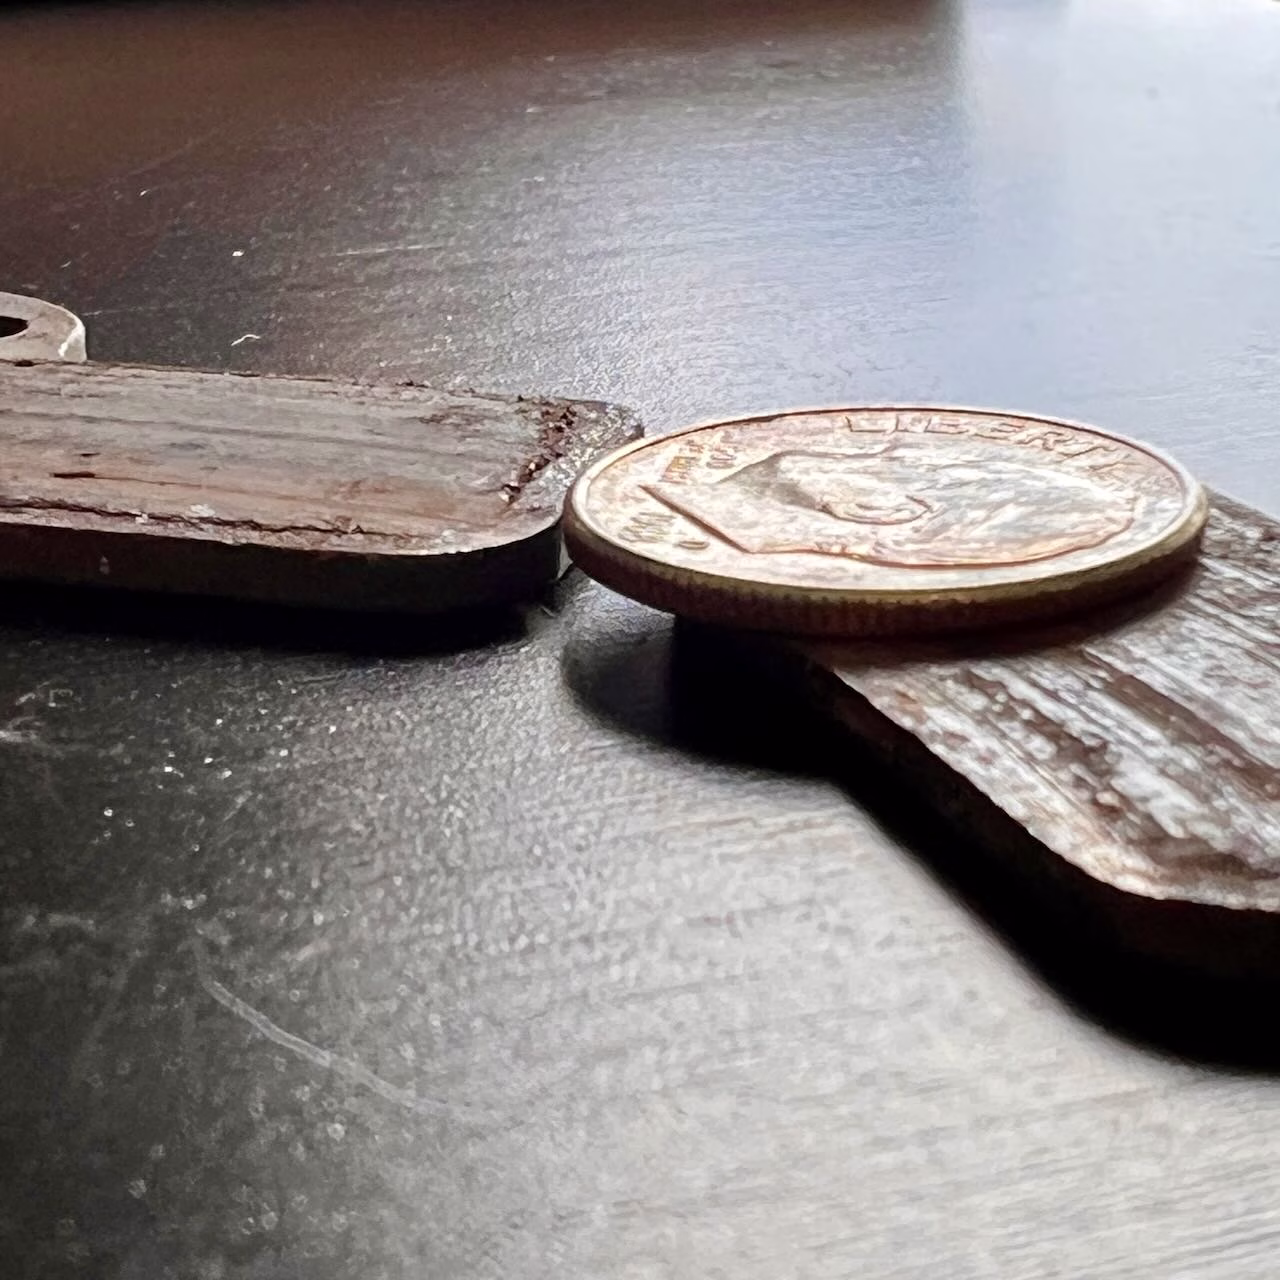
Brake Pads
You might have to remove your wheel to inspect your pads closely. There should be a dime’s thickness of pad material remaining. If your brakes make a metal-on-metal sound, you’re probably grinding the pad’s alloy backing into your rotor!
Not only does this prematurely wear your rotor down, it also runs the risk of grinding away the retaining clip that holds the pads in place. Once the retaining clip fails, you’ll have zero braking power.
Brake Cables/Hoses
Look for bent or fraying cables. Also inspect where the cable enters housing while applying and releasing the brakes to make sure it moves smoothly. A sluggish cable has excess strain being placed on it and will eventually make braking ineffective or even snap.
With hydraulic brakes, examine where hoses enter calipers and levers to make sure there’s no sign of fluid leaking. Also check for wear on cable housing and hoses anywhere they might be rubbing. This is usually where they cross and touch in front of your handlebars. If you’re running a handlebar bag or other equipment on your handlebars, you definitely want to look for places where housing or hoses might be getting pinched or rubbed.
Lift your front wheel off the ground and give it a spin to listen for any brake run. Do the same with the rear. Watch where the rotor passes through the caliper to determine if any rubbing is from an untrue rotor or a brake caliper piston that is not retracting.
Shifter Cables/Batteries
As with brakes, look for bent or fraying cables and inspect where the cable enters housing while shifting up and down to make sure it moves smoothly. If a derailleur cable snaps, it usually does so inside the shifter. Getting the severed end out can be quite an ordeal. Of course, first you have to get yourself home on a single gear!
Running electronic shifting? Charge your batteries! Also check that cables are securely inserted at any ports or junctions. If you use SRAM batteries, check that the three copper contact points where the battery touches the derailleur are clean.
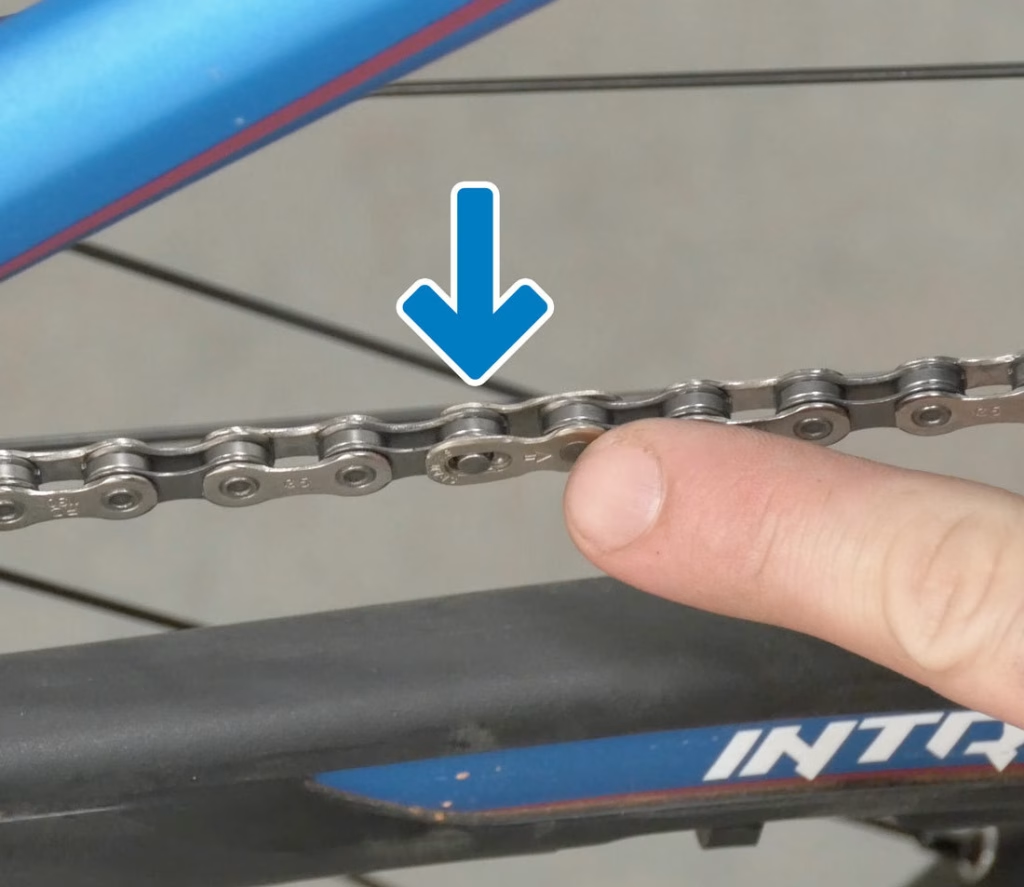
Chain
Spin the pedals backwards. If they spin smoothly your chain is most likely good to go. Find the master link and make sure it is locked in. Use a chain checker tool and replace your chain if it is overly worn.
Rims and Spokes
Inspect for any cracks around spoke nipples and any signs of dents or dings. Where there are dents or dings, look to see if any sealant has escaped where the tire mates with the rim wall.
The same rock strikes that can dent a rim wall can also bend a spoke. Sometimes you can tell by visual inspection of a spoke is not running straight from the hub to the rim. In addition to bent spokes, grab each pair of spokes where they cross (unless you have a radially laced wheel), and give them a pull to feel for any looseness.
With disc brakes, a broken spoke will not bring your ride to an end. Nevertheless, it’s best to catch an issue with a potential spoke failure before it happens to prevent any further damage to your wheel.
Hubs
With the wheels on the ground, grab the top of the tire and push back and forth (perpendicular to the direction of rolling) to see if there is any play in the hub. Spin the wheel to listen for any roughness or grinding in the hub bearings. Consider spinning the rear wheel backwards if you have a loud freehub, otherwise the buzzing free hub noise will make it difficult to hear any irregularities in your hub’s bearings.
Tires
Inspect sidewalls for signs of bulges, cuts or exposed threads in the tire lining. Check the rolling surface for signs of excessive wear. If you’re running a tubeless set up, at some point you may spot a piece of glass, nail or other object that is embedded in the tire.
Unless the tire looks deformed or otherwise severely damaged around the intruding object, it might be best to leave it. The sealant has already done its job and removing the object now might create an opening bigger than the sealant can seal.
Valves
Look for bent presta valve heads and keep valve core replacements on hand to replace them. Look for any signs of sealant leaking from around the valve nut. Be sure the nut is snug by using your fingers to tighten it. Do not use pliers or any other tool to tighten the nut!
Bottom Bracket
Grab the cranks and push/pull them perpendicular to the direction of travel. Any looseness or play might be a sign that your bottom bracket needs replacing.
With the chain off the chainring, spin the cranks. They should spin freely without resistance or noise.
Headset
Here you’re looking for signs that the headset might be loose or that the bearings need to be replaced. Gently push the front tire up against a wall and feel, listen and observe for any movement where the fork’s steerer tube enters and exits the head tube.
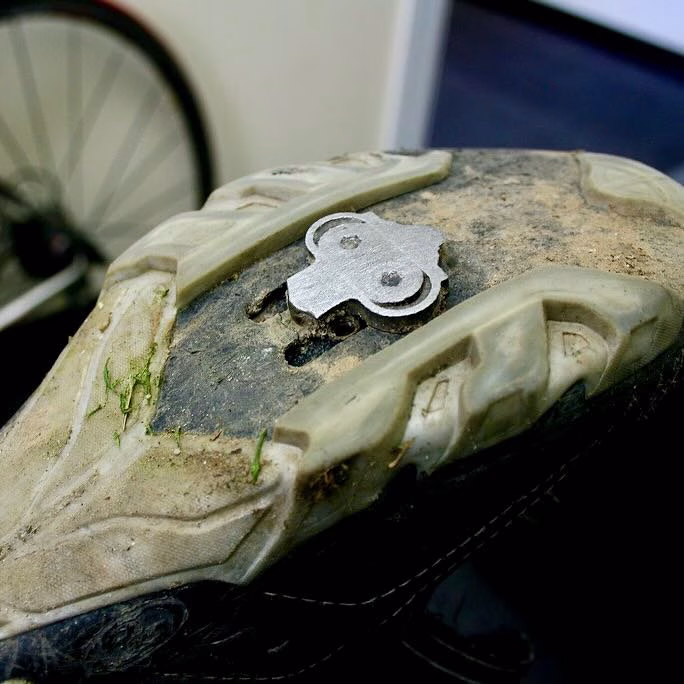
Cleats
I’ve been slipping out of my Shimano SPD pedals recently, which is unusual. I tried increasing the tension on the pedal to no avail. Then one day I was wearing a diferent pair of shoes with newer cleats. No slippage. That’s when I realized that even steel SPD cleats can wear out. If you ride a pedal system with a plastic cleat (like the road pedals that I advise against in Tip #2), you’re especially prone to worn or even broken cleats.
So it doesn’t hurt to check your cleats with some regularity. On some multi-day adventures I’ll either use flat pedals to eliminate the cleat problem, or bring a spare pair of cleats as backup.
After Bike Inspection Comes Bike Maintenance
Each point of inspection described so far is a starting point. If everything looks good and passes your inspection, your bike is ready for adventure. But if there are any red flags, you’ll need to know how to repair or replace the part.
I’m always happy to give advice. I was lucky enough to have a mechanic at a local shop who was generous with his time and showed me much of what I know. So paying it forward is the least I can do.
There’s also YouTube University! I don’t hesitate to search for a video demonstrating how to do something I’m struggling with. This is especially useful if your bike has proprietary or otherwise obscure or specialized parts where the steps for their adjustment or replacement is not obvious. Almost certainly, someone out there with the same part has made a video showing you what you need to know.
The key is to do your inspections regularly so that you’re not trying to learn how to make an adjustment or replace a part just as you’re about to head out on a big adventure.